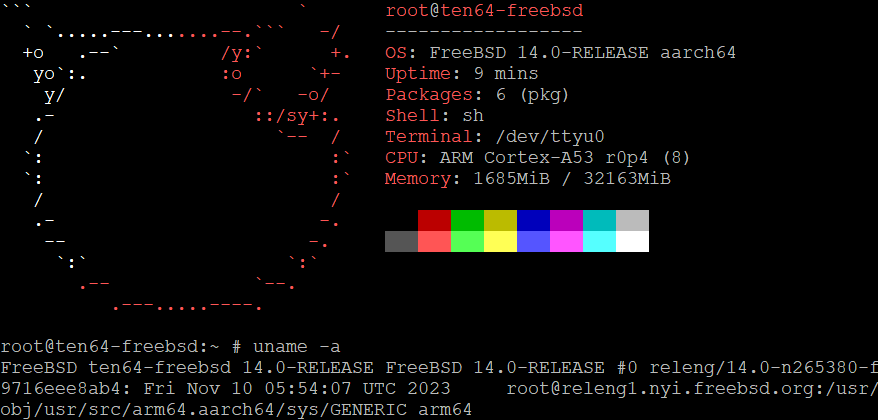
FreeBSD 14.0 was released recently, and the good news is that it includes all the relevant device drivers for the Ten64, including DPAA2 Ethernet, PCIe, real time clock, SD/MMC.
Many, many thanks to the hard work of @dsl, bz and others that made this possible!
However, a few bug fixes did not make it in FreeBSD in time for the release, so you should update your kernel as soon as possible (or install an image with the fixes included).
Specifically:
- There was an issue with no traffic flowing on PHY-managed Ethernet ports (1GBase-T) until the cable was re-inserted (see Github issue and D42643)
- There was an issue with VLANs not working (see D42645)
Options to install FreeBSD
-
Use the
freebsd-14-ten64appliance withbaremetal-deploy
This is an image I have compiled that includes the relevant fixes.You should do a discard/TRIM (
blkdiscard -f) on your storage device first, to ensure any secondary GPTs/old partition tables are wiped.root@recovery000afa24306:/# appstore-list ... community |freebsd-14-ten64 |FreeBSD 14.0-RELEASE + DPAA2/Ten64 fixes # Wipe your storage device root@recovery000afa24306f:/# blkdiscard -f /dev/nvme0n1 root@recovery000afa24306f:/# baremetal-deploy freebsd-14-ten64 /dev/nvme0n1 -
Install FreeBSD 14.0-RELEASE from the ISO installer
This gives you more configuration options, like setting up ZFS as the root file system.You can write
FreeBSD-14.0-RELEASE-arm64-aarch64-dvd1.isoto a USB drive and boot the system from it. -
Deploy the official release image using baremetal deploy
Similar to option 1, you can deploy the official FreeBSD 14.0-RELEASE image:baremetal-deploy freebsd-14 /dev/nvme0n1
Installing fixed kernel (for FreeBSD official images)
If you are familiar with compiling your own FreeBSD kernels, you an either update to the latest stable/14 or my branch (used in image 1 above).
If not, you can download a pre-built kernel and install it like so:
fetch https://archive.traverse.com.au/pub/ports/freebsd/freebsd-14-kernel-with-dpaa2fix.tar.gz
mv /boot/kernel /boot/kernel.old
tar -C /boot -zxvf freebsd-14-kernel-with-dpaa2fix.tar.gz
# After reboot into the new kernel, uname -a reads:
FreeBSD ten64-freebsd 14.0-RELEASE FreeBSD 14.0-RELEASE #0 14_0_releng-n265385-7eacc6ca558: Tue Nov 21 08:50:06 UTC 2023     matt@freebsd:/usr/obj/usr/src/freebsd-src/arm64.aarch64/sys/GENERIC arm64
Tips and tricks
Ethernet bridging
I have found that I need to use autobridge to get an Ethernet bridge (between multiple dpniX) working reliably on startup:
$ cat /etc/rc.conf
hostname="ten64-freebsd"
if_bridge_load="YES"
bridgestp_load="YES"
cloned_interfaces="bridge0"
ifconfig_bridge0="inet 192.168.13.1 netmask 255.255.255.0 up"
autobridge_interfaces="bridge0"
autobridge_bridge0="dpni0 dpni1 dpni2 dpni3"
ifconfig_dpni6="DHCP inet6 accept_rtadv"
ifconfig_dpni0="up"
ifconfig_dpni1="up"
ifconfig_dpni2="up"
ifconfig_dpni3="up"
network_interfaces="bridge0 dpni6"
SFPs
Firstly, you will need to ensure that your Ten64 is in legacy SFP mode.
In U-Boot:
setenv sfpmode legacy
savvenv
reset # reboot to apply this setting
FreeBSD does not (yet) have the ability to control SFPs like Linux does, so if you have an “active” SFP (fiber optic, or XBase-T, but not a DAC), you will need to assert the SFP’s TXDISABLE line to make them link up.
Like so:
# Lower SFP
gpioctl -f /dev/gpioc4 -c 1 OUT PP
gpioctl -f /dev/gpioc4 1 0
# Upper SFP
gpioctl -f /dev/gpioc4 -c 5 OUT PP
gpioctl -f /dev/gpioc4 5 0
